
How To Spool A Casting Reel
Table of Contents
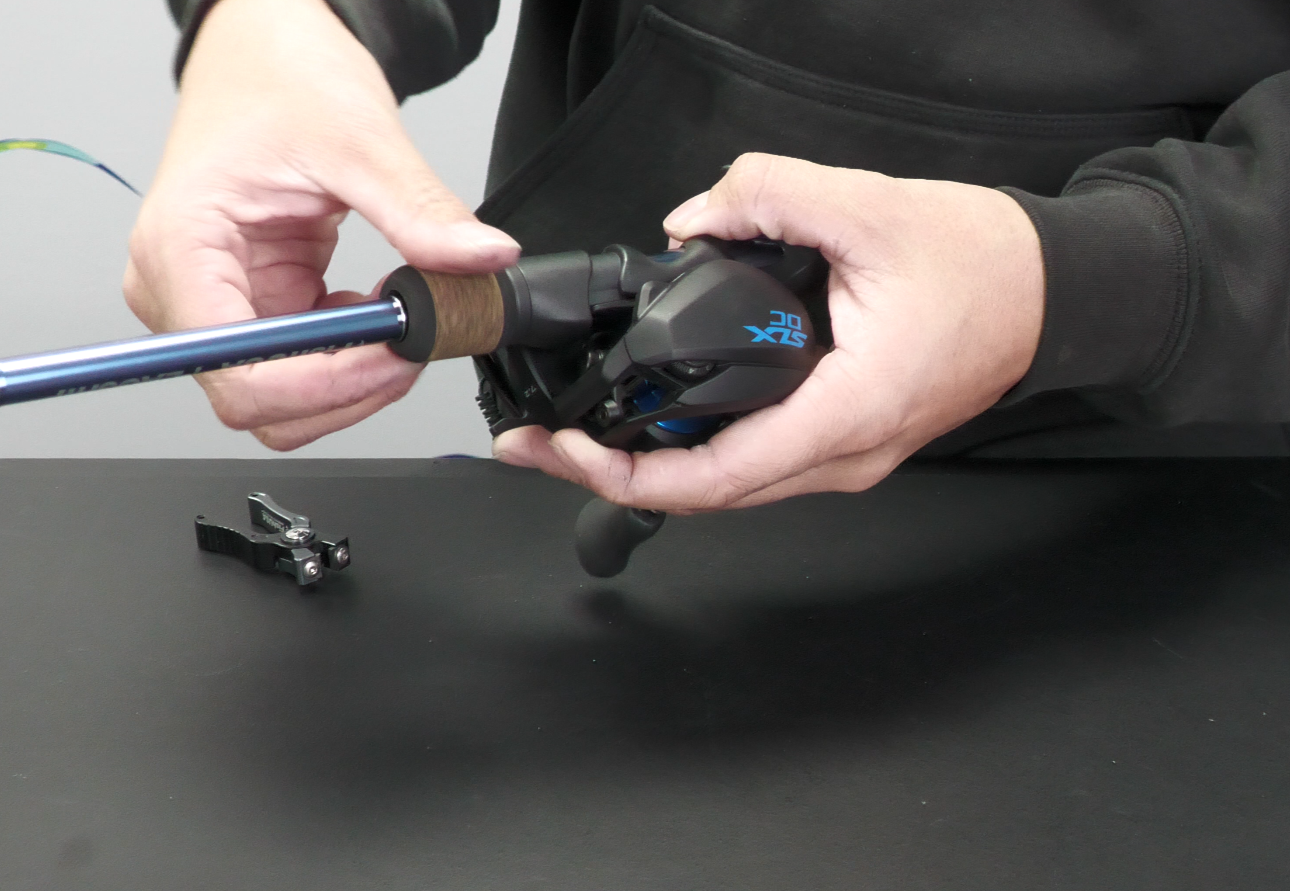
Step 1: Attach the Reel to the Rod
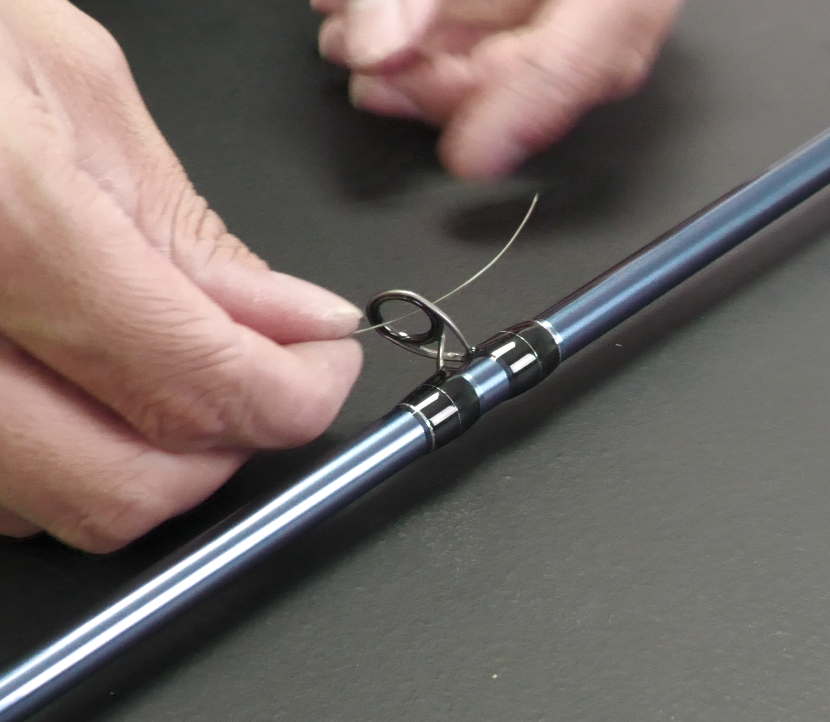
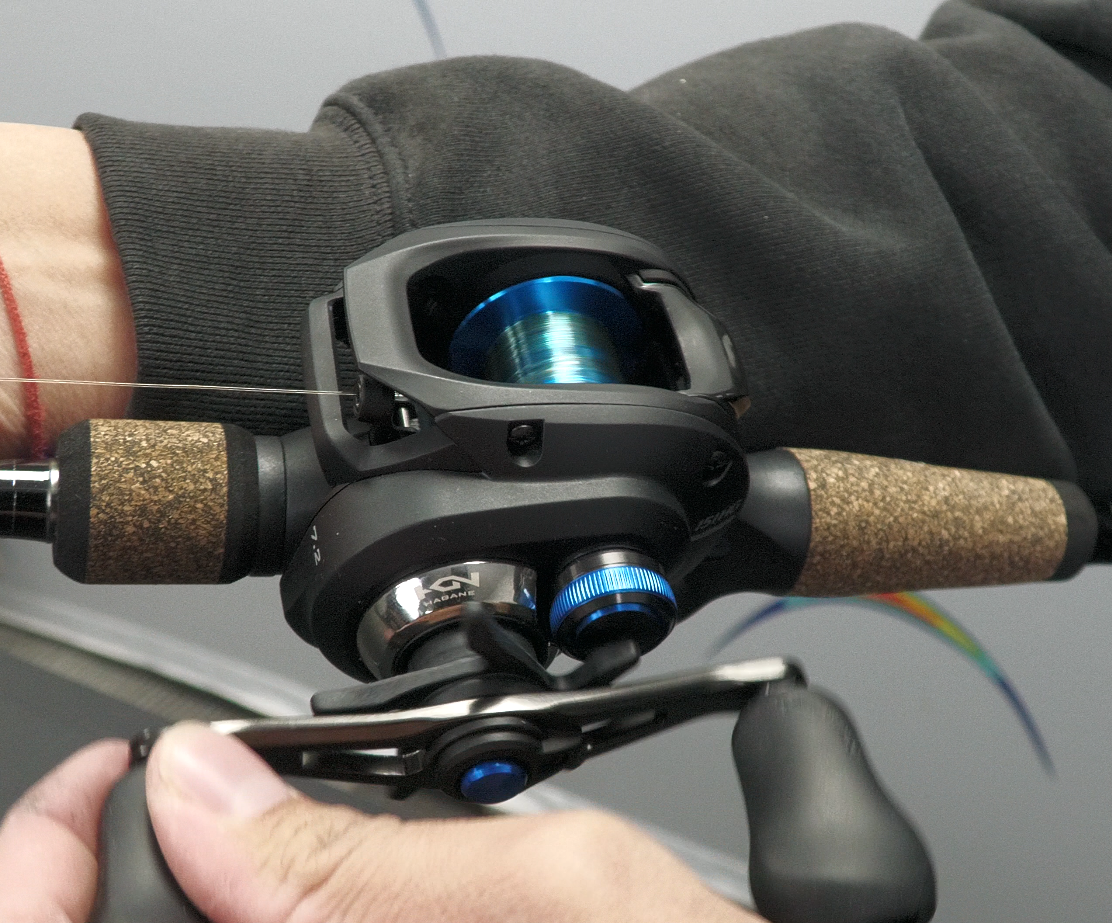
Step 2: Thread the Line
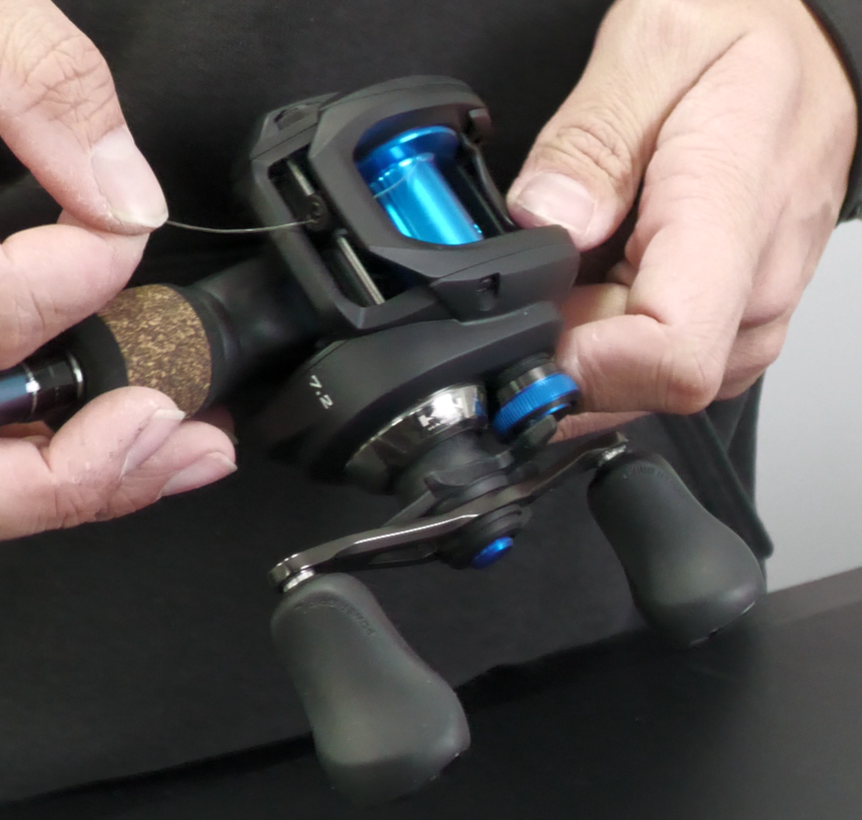
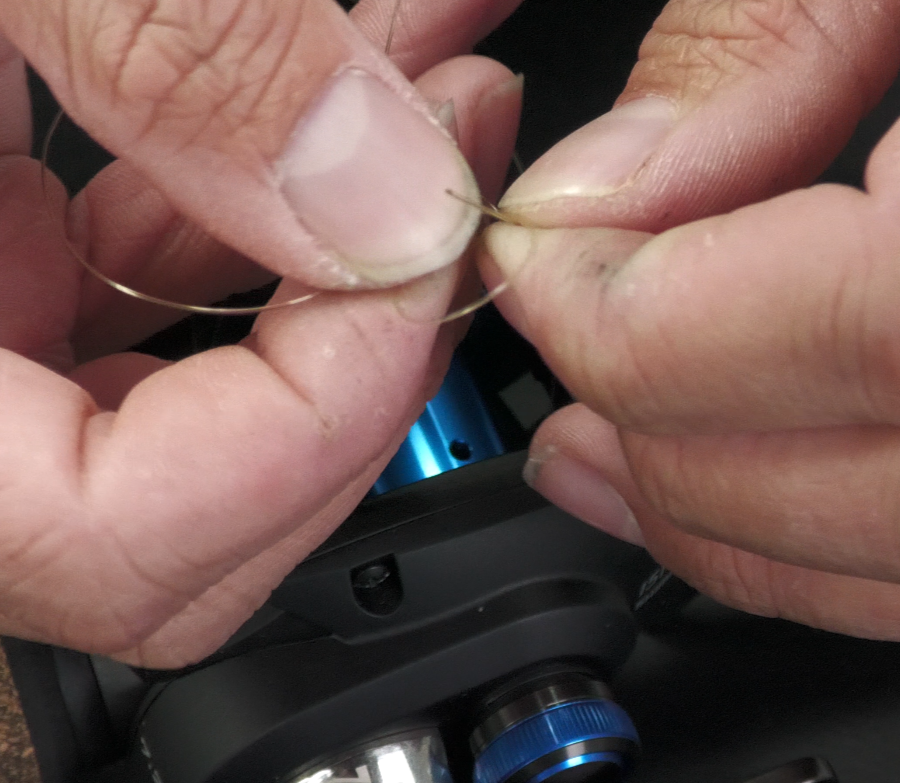
Step 3: Attach the Line to the Spool
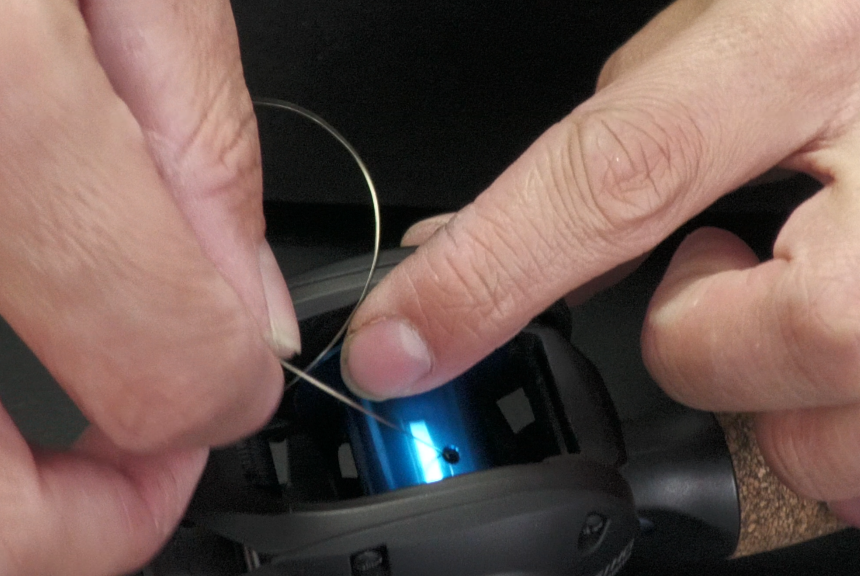
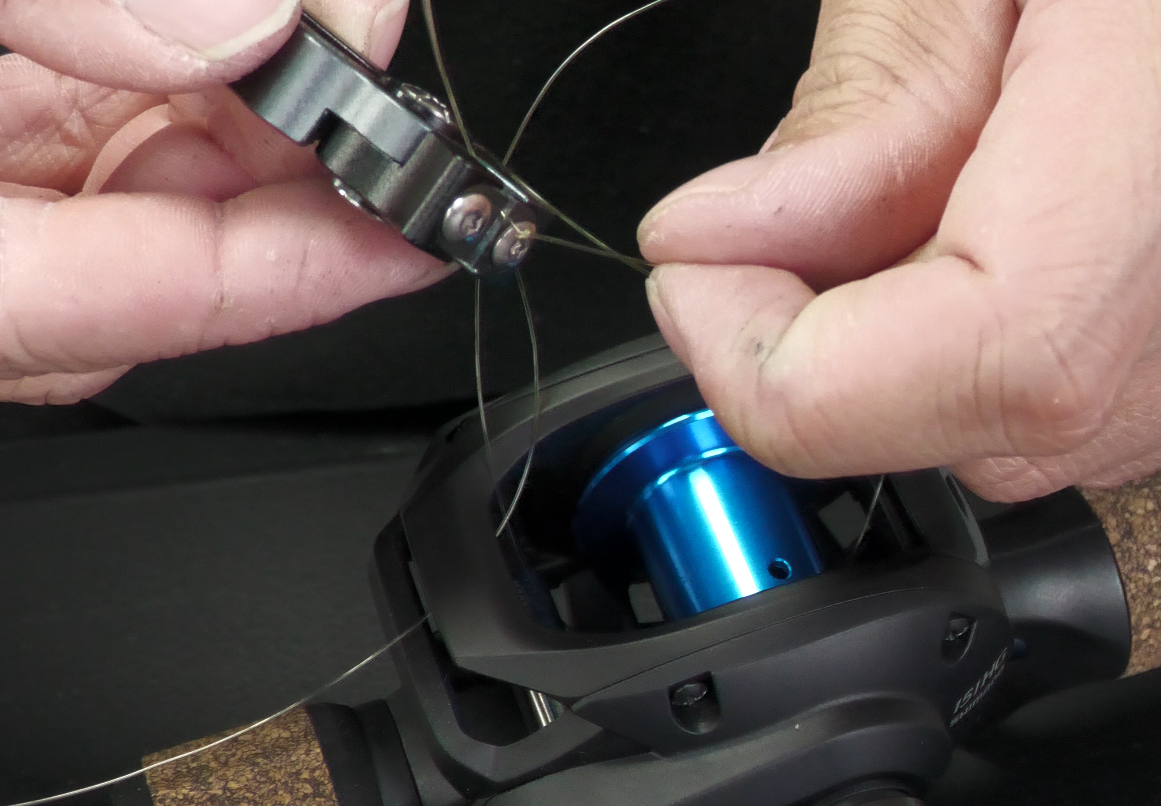
Step 4: Secure the Line
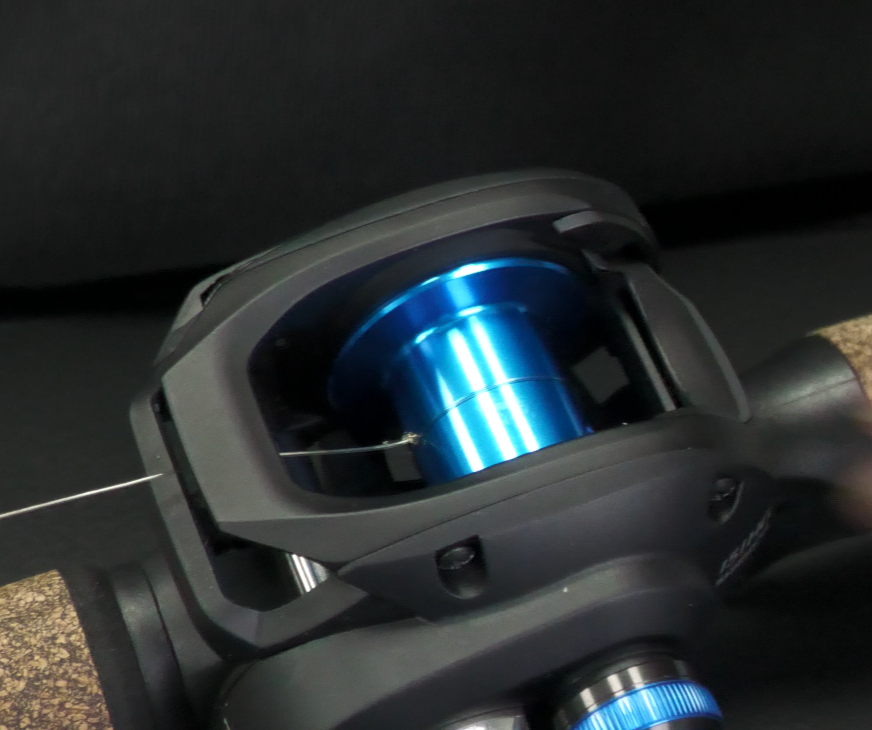
Step 5: Apply Tension and Begin Spooling
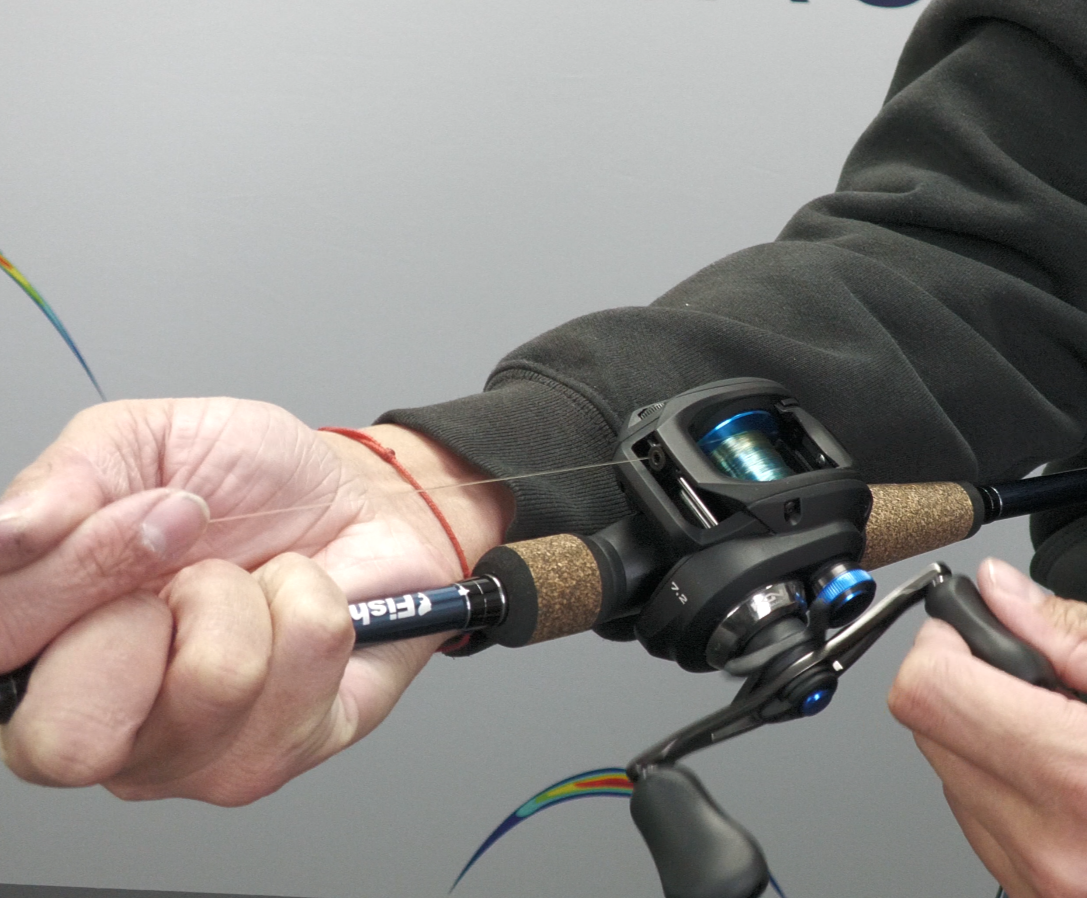
Step 6: Fill the Spool
Step 7: Finalize the Process
Additional Tips
Shop Fishing Gear